Skink painting guide
- Martin Gylling

- Dec 21, 2020
- 4 min read
Updated: Dec 23, 2020
Inspiration
I wanted to paint my skink using blue tones but not completely mimic the box art. I looked online for some reference images of blue lizards. The species that I eventually went with was the Mexican alligator lizard.

Photograph: Matthijs Kuijpers/Alamy
Paints
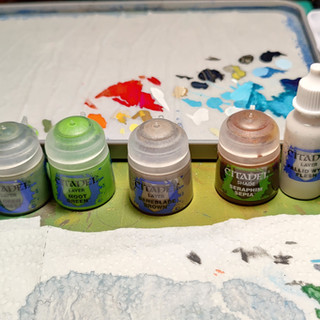
The following paints are used in this guide;
Vallejo Night Blue
Vallejo Turquoise
Vallejo Cold Grey
Vallejo Dead hite
Vallejo Heavy Brown
Vallejo Sepia Ink
Citadel Ionrach Skin
Citadel Pallid Wych Flesh
Citadel Seraphim Sepia
Citadel Baneblade Brown
Citadel Moot Green
Citadel Loren Forest
Citadel Stormhost Silver
Citadel Retributor Armor
Citadel Drakenhof Nightshade
Citadel Biel-tan Green
Citadel Athonian Camoshade
Citadel Carroburg Crimson
Citadel Mephiston Red
Citadel Flash Fitz Yellow
Citadel Lugganath Orange
Citadel Trollsslayer Orange
Preparation
For the base, I first applied a layer of sand using PVA glue. After the glue had set I applied some moss and dried coconut fibre in a moderate amount. Finally I glued a small plastic plant to the base that I had cut off from a cheap piece of aquarium decoration.

I decided to glue the arm with the shield to a toothpick for ease of handling when painting in a subassembly.

Priming/Underpainting
I began by priming the entire model and base with an airbrush using surface primer gray from Vallejo.

In the next step I applied a zenithal highlight straight above the model using an off-white ivory color. This creates subtle highlights where the light would naturally hit model.

In the final step i drybrushed the entire model using Vallejo Dead White to accentuate the sharp details and edges on the model.

Painting the model
I started by mixing some base colors using a mix of 50/50 Dead White/Pallid Wych Flesh and 30/70 Dead White/Turquoise respectively.
I applied the off-white mixture to the belly and the chin and the Turquoise mixture to the surrounding skin and started to blend them together using wetblending, progressively building up smoother transitions.


When I was satisfied with the transitions, I then applied the same Turquoise mixture on all the skin on the model.

With the off-white mixture I then applied in the centre of the belly and the chin and smoothened the edges of the layer using the feathering technique.

With the blend completely done, the next thing I did was to basecoat the fin and the eyesockets using the same off-white mixture.

For the next step I did a rough mixture of 50/50 Turquoise/Night Blue.

With the mixture I then applied a basecoat to the scales.

In order to highlight the scales I created a brighter version of the blue mixture by adding some Dead White to it.

With a flat brush it then carefully drybrushed all over the scales.

To add some contrast to the model I shaded the entire model using Drakenhof Nightshade diluted with water.

I then mixed an even brighter version of the Turquoise mixture used for the skin by adding more Dead White.

With the bright Turquoise mixture I did some edge highlights on the sharpest details of the skin. On the the fin, eyesockets, chin and belly did some highlights using pure Dead White.

The next thing I did was to basecoat all the claws with Ionrach Skin, shade with Seraphim Sepia and finally highlight with Ionrach Skin.

Even though the lizard I used for inspiration have blue eyes I went with a yellow color on the eyes to create more contrast in color and to draw more attention towards the face of the model. The first thing I did was to carefully basecoat the eyes using Flash Gitz Yellow.

I then highlighted the centre of the eyes with a mixture of 75/25 Flash Gitz Yellow/Dead White.


The next thing I did was to paint the pupils using Black, followed by a small dot inside the pupils with Dead White.


Next up I basecoated all the rope and the shaft of the javelin with Heavy Brown.

I then highlighted the shaft and the ropes using a mixture of 25/75 Dead White/Baneblade Brown.


The next thing I did was to basecoat all the gold details using Retributor Armor followed by a wash of Seraphim Sepia.

Next I applied a Black basecoat on the javelin head.

Then I created a mixture of 25/75 Cold Grey/Black and stippled onto the javelin head using a flat brush. This gives the javelin head some texture and the impression of obsidian stone.


Next I did edge highlighting on all the edges of the javelin head using Cold Grey.

As a final highlight on the edge of the javelin head i used a mix of 50/50 Cold Grey/Dead White.


The next thing I did was to edge highlight allt the golden details using Stormhost Silver. Unfortunately I forgot to take a picture of this step but you can use later pictures as reference.
The last step of the model was to paint the shield. I started by giving the whole shield a basecoat of Mephiston Red, followed by a wash of Carroburg Crimson. After the wash had dried I put a layer of 75/25 Mephiston Red/Trollsslayer Orange on the raised details of the shield.


Then I added more Trollsslayer Orange to the mixture creating roughly a 50/50 mix of Mephiston Red/Trollsslayer Orange and highlighted all the raised details and edges of the shield.


As final highlights I added very thin lines of Lugganath Orange on the previous highlight, still leaving some of the previous highlights showing.

After the paint had dried I glued the arm to the rest of the model before moving on to painting the base.
Painting the base
The first step I did was to wash all the sand on the base with Vallejo Sepia Ink, followed by Athonian Camoshade on the coconut fibre, moss and plant. On the plant I also added a wash of Biel-tan Green while the Athonian Camoshade was still wet.

When the shades and the ink had dried I drybrushed the coconut fibre with Loren Forest.

The next thing I did was to put a layer of Loren Forest on the plant.

As a final step I did a edge highlight on the plant using Moot Green.

After painting the rim of the base with black the skink was complete.

Thank you for reading!


Comments